How to Eat Through Bangkok’s Street Food Scene Like a Pro in 2026

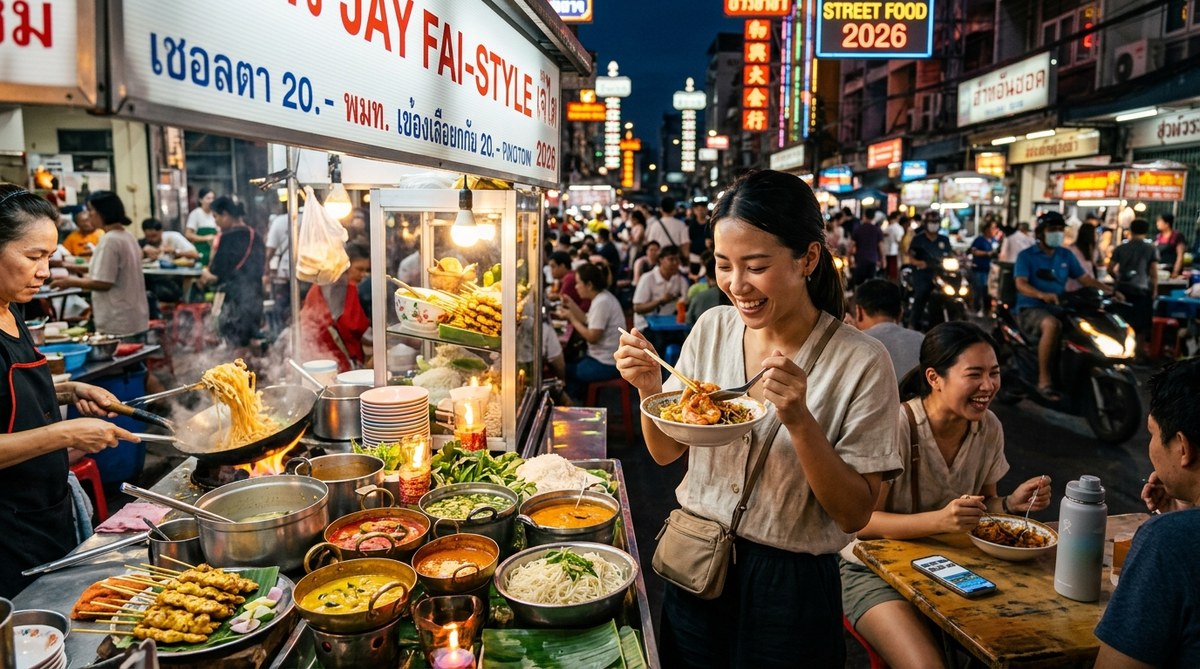
Bangkok’s street food is more than a meal. It’s a pulse. The sizzle of a wok, the hiss of charcoal, the chatter of locals bargaining over bowls of noodles at midnight. If you’re visiting in 2026, you’…

Bangkok’s street food is more than a meal. It’s a pulse. The sizzle of a wok, the hiss of charcoal, the chatter of locals bargaining over bowls of noodles at midnight. If you’re visiting in 2026, you’re in for a treat (literally). But eating your way through this chaotic, delicious landscape takes more than just a hungry stomach. It takes a little know-how. Let’s get you eating like a seasoned local, one stall at a time.

Key Takeaway

This guide turns you from a confused tourist into a street food pro. You’ll learn where to find the best stalls, what to order without a menu, and how to eat safely. We cover timing, etiquette, and money tips so you can spend less time guessing and more time eating. By the end, you’ll navigate Bangkok’s food scene with confidence and a full belly.

Why Bangkok Street Food is a Must in 2026

Bangkok’s street food isn’t just famous. It’s a UNESCO-recognized part of the city’s soul. In 2026, the scene is as vibrant as ever, with new stalls popping up alongside century-old family recipes. You can eat world-class dishes for under two dollars. You can eat at midnight, at dawn, or any time in between. The city practically never sleeps because someone is always frying, grilling, or boiling something good.

But the best stalls aren’t on Instagram. They’re in alleyways, under expressways, and in markets that only locals know. That’s where this guide comes in. We’ll cut through the noise and get you to the real food.

How to Plan Your Street Food Crawl

Treat your street food tour like a treasure hunt, not a race. Here’s a five-step plan that works every time.

  1. Pick your neighborhood base. Don’t try to cover the whole city in one night. Choose one or two areas: Yaowarat (Chinatown) for roasted duck and seafood, Thong Lor for trendy grilled meats, or the old city around Khao San for budget eats. Each has a different vibe. Stick to a small radius so you can walk from stall to stall.

  2. Time your meals right. Most stalls open for dinner around 5 PM and stay open until late. Lunch stalls are common near office areas but close by 2 PM. For the best selection, eat between 6 PM and 9 PM. For the freshest food, come when the vendor is busy, not after they’ve been sitting on a batch for hours.

  3. Start with the basics. You don’t need to order the most exotic thing on the first night. Begin with a classic pad thai, a bowl of tom yum soup, or a plate of khao man gai (chicken rice). These dishes are popular for a reason, and a good version will blow your mind.

  4. Watch the locals. Stand back for a minute and see what people order. If ten people are eating the same thing, that’s what you should get. Also notice how they eat. Some dishes come with raw vegetables or herbs on the side. Use them.

  5. Bring cash and small bills. Most stalls don’t take cards. Break your 1,000 baht notes at a 7-Eleven or a larger shop first. And always have coins handy for small purchases like grilled skewers or fresh juice.

Must-Try Dishes for a True Taste of Bangkok

This list covers the essentials. Order these, and you’ll leave with a happy stomach and a desire to come back.

  • Pad Thai (but skip the tourist version): Look for a stall that uses tamarind paste, not ketchup. It should be slightly sweet and sour.
  • Som Tum (green papaya salad): Spicy, sour, crunchy. Ask for “mai pet” (not spicy) if you need to ease into it.
  • Tom Yum Goong: Hot and sour soup with shrimp. The broth should be clear, the flavors bold.
  • Khao Soi: A northern Thai coconut curry noodle soup. Creamy, spicy, and topped with crispy noodles.
  • Moo Ping (grilled pork skewers): Don’t leave without trying these. The marinade is a perfect mix of garlic, soy, and coconut milk.
  • Roti Gluay: A thin, crispy banana pancake drizzled with condensed milk. Perfect for dessert.
  • Mango with Sticky Rice: Only eat it when mangoes are in season (April to June). Off-season versions are disappointing.

Street Food Etiquette Do’s and Don’ts

Small habits make a big difference. These will earn you a smile from the vendor and a better meal.

Common Mistake Smart Local Move
Standing too close to the cooking area Keep a respectful distance and watch from the side
Using your left hand to handle food or money In Thai culture, the left hand is considered unclean. Use your right hand
Leaving a huge tip Tipping is appreciated but not expected. A few coins left on the table is fine
Taking photos without asking Always ask permission. A smile and a nod usually works
Not using the provided chopsticks or spoon Even for noodles, try the local way. It’s part of the experience

Expert Advice from a Bangkok Food Blogger: “I’ve been eating street food in Bangkok for over a decade. The golden rule? If the stall looks clean, has high turnover, and the vendor smiles, you’re in good hands. Trust your nose and your instincts. And never skip the stool with the red cushion. That’s always a good sign.”

Safety Tips Every Visitor Should Know

Street food is safe when you follow a few simple rules. Don’t let fear stop you from trying amazing food.

  • Look for high turnover. A stall that sells out quickly means fresh ingredients. Avoid food that has been sitting out for hours.
  • Watch how they handle raw ingredients. If the vendor uses separate utensils for raw meat and cooked food, that’s a green flag.
  • Drink bottled water only. Ice in Thailand is usually made from purified water, but stick to bottled to be safe.
  • Start with cooked food. Raw dishes like shrimp salad or minced pork can be risky for first timers. Build up your tolerance slowly.
  • Carry a small bottle of hand sanitizer. Many stalls have a shared bucket of water for rinsing. Use your own sanitizer instead.

For a broader approach to eating safely abroad, check out the secret to finding the best street food in any city without getting sick.

Where to Find the Best Street Stalls in 2026

Some areas are legendary for street food. Here’s where to point your feet.

  • Chinatown (Yaowarat) : The king of Bangkok street food. Go at night when the whole street turns into a glowing market. Must-try spots include the roasted duck at Nai Ek Roll and the seafood at T&K.
  • Sukhumvit Soi 38 : A classic spot that was demolished a few years back but has since rebuilt. The mango sticky rice here is still the benchmark.
  • Banglampoo (near Khao San Road) : Good for cheap eats and backpacker-friendly stalls. Try the pad thai at Thipsamai, but expect a line.
  • Or Tor Kor Market : A daytime market near Chatuchak. It’s cleaner and more organized than most, with high-quality produce and ready-to-eat dishes. Perfect for lunch.
  • Wang Lang Market : Across the river in Thonburi. Less touristy, very authentic. Great for boat noodles and grilled fish.

If you’re looking for more hidden food spots in other cities, you might enjoy where locals actually eat in tourist-heavy cities.

Common Mistakes Even Seasoned Travelers Make

Even experienced travelers can trip up in Bangkok’s food scene. Avoid these.

  • Assuming the busiest stall is always the best. Sometimes tourists just follow each other. Look for a steady mix of locals and a reasonable line.
  • Ordering without knowing the price. Always ask “tao rai?” (how much?) before you order. Some stalls charge tourists double. A quick question keeps things fair.
  • Eating only one dish. Street food is about mixing and matching. Order a skewer here, a soup there, a dessert from the next cart.
  • Forgetting about the sides. Every stall serves fresh herbs, cucumber slices, and chilies. Use them. They add texture and cut through the grease.
  • Not bringing a container for leftovers. Thai portion sizes are generous. If you can’t finish, ask for a bag. It’s common and polite.

Your 2026 Bangkok Street Food Adventure Awaits

The beauty of Bangkok’s street food is that you don’t need a reservation or a dress code. You just need curiosity and an appetite. Start with the neighborhoods and dishes we’ve covered, talk to the vendors, and trust your senses. Each stall has a story, and each bite teaches you something about this incredible city. So grab your cash, step away from the hotel buffet, and hit the streets. Your taste buds will thank you. And when you get back, tell us what you ate. We’ll be hungry to hear about it.

The Simple Pre-Flight Check Most Travelers Skip

Most travelers rush through the airport, forgetting one key step that can save time, money, and frustration. That step is a proper pre-flight checklist. You might think you have it all under control, …

Most travelers rush through the airport, forgetting one key step that can save time, money, and frustration. That step is a proper pre-flight checklist. You might think you have it all under control, but the difference between a calm departure and a frantic sprint to the gate often comes down to a few minutes of preparation at home. In 2026, with packed terminals and evolving TSA rules, that simple check has never mattered more.

Key Takeaway

A solid pre-flight checklist does not need to be long. The single most overlooked step is verifying your travel documents and flight details 24 hours before departure. Combine that with smart packing, digital downloads of boarding passes, and a cached map of your airport terminal. These actions shave off stress, prevent forgotten essentials, and let you walk through security like a pro. Do it before you leave home, not at the gate.

The One Step Most Travelers Skip Entirely

When was the last time you double checked your passport expiration date? Most people glance at it, see a valid year, and assume they are fine. The problem is many countries require your passport to be valid for at least six months beyond your travel dates. In 2026, that rule still applies to popular destinations like Thailand, Brazil, and much of Europe. A friend of mine once missed a trip to Italy because his passport had only five months of validity left. He learned the hard way.

Here is the step: pull out your passport, check the issue and expiration dates, and confirm your destination’s entry rules. Do this the night before, not at the airport counter. While you are at it, verify that your visa or ESTA is still valid. A ten minute check can save you hundreds of dollars and a ruined vacation.

Your Simple Pre-Flight Checklist: Five Steps

Follow this numbered list before you leave home. Each step takes under two minutes.

  1. Confirm your flight and gate. Open the airline app or website and check for schedule changes, gate updates, and any delays. Airlines often adjust gates overnight, and you do not want to walk to the wrong end of the terminal.

  2. Download all travel documents. Save your boarding pass, hotel reservation, and any entry forms to your phone’s wallet or a dedicated folder. Do not rely on airport Wi-Fi. In 2026, most major US airports have free Wi-Fi, but coverage between terminals can be spotty. A downloaded PDF never fails.

  3. Pack your liquids and electronics for easy access. Place your quart sized bag of liquids on top of your carry on. Make sure your laptop and tablet are in a separate pocket. Security lines move faster when you do not have to dig through your bag.

  4. Charge everything the night before. Phone, tablet, power bank, earbuds, and any camera. A dead power bank is useless. Plug them all in before you go to bed, and toss a charging cable in your personal item.

  5. Set a reminder to check TSA wait times. Apps like MyTSA or airline apps give real time security estimates for your airport. If the wait is long, you can adjust your arrival time. This one step alone can save you thirty minutes of standing in line.

Common Pre-Flight Mistakes and How to Avoid Them

  • Forgetting to notify your bank. International travel triggers fraud alerts. Call or use your bank’s app to add a travel notice. Otherwise, you might find your card declined when trying to buy a coffee in Rome.

  • Overpacking your personal item. Many airlines now enforce strict size and weight limits for personal items. A bulging backpack might be forced into the sizer at the gate. Pack only what you need for the flight.

  • Ignoring the weather at your destination. You packed for shorts and sandals, but a cold front just hit. Check the forecast three days out and again the night before. Pack a light jacket or umbrella if needed.

  • Waiting until the airport to eat. Airport food is overpriced and often mediocre. Eat a proper meal at home or pack a sandwich. You will stay calmer and save money.

Do This, Not That: A Quick Reference Table

Mistake Smart Alternative
Print boarding pass at airport kiosk Download to phone wallet before leaving
Arrive exactly at recommended time Add 15 minutes for traffic and parking
Wear bulky shoes to save luggage space Wear comfortable slip off shoes for security
Stuff chargers in checked bag Keep all cables and power bank in carry on
Forget to lock checked suitcase Use TSA approved lock or zip ties

Expert Advice from a Veteran Flight Attendant

“The passengers who always breeze through security are the ones who do their pre flight check before they even leave the house. They have their ID in hand, their phone charged, and their liquids bag on top. The ones who struggle are the ones who wait until they reach the checkpoint to start looking for their boarding pass. I’ve seen people miss flights because they had to go back to the car for a forgotten passport. A five minute check at home is all it takes.”

— Sarah, flight attendant with over ten years of experience

Using Digital Tools to Streamline Your Check

Your phone is the most powerful pre flight tool you own. In 2026, every major airline offers a robust app that lets you check in, select seats, and store boarding passes. Third party apps like TripIt can aggregate all your bookings into one timeline. But do not stop there. Save a screenshot of your gate and terminal number. Set a calendar reminder for check in time, which is usually 24 hours before departure. And if you are flying internationally, download an offline map of your destination city so you can navigate without data. For example, you might want to use a guide like our tips on getting around cities like a local once you land.

Another overlooked feature is airline lounge access apps. Even if you do not have a premium credit card, some programs let you buy a day pass for around $50. If your layover is three hours or more, the peace and quiet can be worth it. Check the lounge availability in advance.

When to Start Your Pre-Flight Routine

Do not wait until the morning of your flight. The best time to start is the night before. Set aside twenty minutes after dinner. Go through the checklist while you are still relaxed. Confirm your documents, pack your carry on, and charge your devices. Then in the morning, you only need to grab your bag, do a quick visual check of your essentials, and leave. This two step approach reduces the risk of forgetting something important.

If you are a frequent traveler, consider creating a permanent checklist on your phone. Use a notes app or a shared family list. That way you never have to reinvent the process. It takes ten minutes to set up and saves hours of stress over the course of a year.

A Pre-Flight Checklist for the Whole Family

Traveling with kids adds extra layers. Include a separate checklist for children’s items: snacks, tablets with downloaded shows, headphones, a change of clothes, and any medications. Write down each family member’s document details in one secure note. In 2026, TSA allows children under 12 to keep their shoes and light jackets on during screening, but you still need to have their passport or birth certificate ready. Practice with your kids beforehand so they know what to expect. A smooth pre flight routine sets the tone for the entire trip.

How to Handle Last Minute Emergencies

Sometimes things go wrong even with the best checklist. Your flight gets canceled. You leave your phone in the taxi. You forget your medication. Build a small buffer into your plan. Keep a physical printout of key documents in your checked bag. Store an extra charging cable in your car. And always have a backup credit card hidden in a different pocket. If the worst happens, stay calm. Airlines in 2026 are required to rebook you on the next available flight at no extra cost if the delay is their fault. But you still need to get to the counter quickly. Knowing your flight number and booking reference speeds everything up.

Transform Your Next Flight into a Smoother Experience

A pre-flight checklist does not have to be complicated. It just needs to be consistent. The travelers who breeze through security and board with a smile are not lucky. They prepared. They took ten minutes the night before to verify documents, pack smart, and charge their devices. You can do the same. Start tonight. Pull out your passport, open your airline app, and run through the steps. Then tomorrow, when you walk past the long security line because you have TSA PreCheck, or simply because you have everything ready, you will feel the difference. Safe travels in 2026.

10 Unwritten Rules of Tipping in Major Cities That Most Tourists Get Wrong

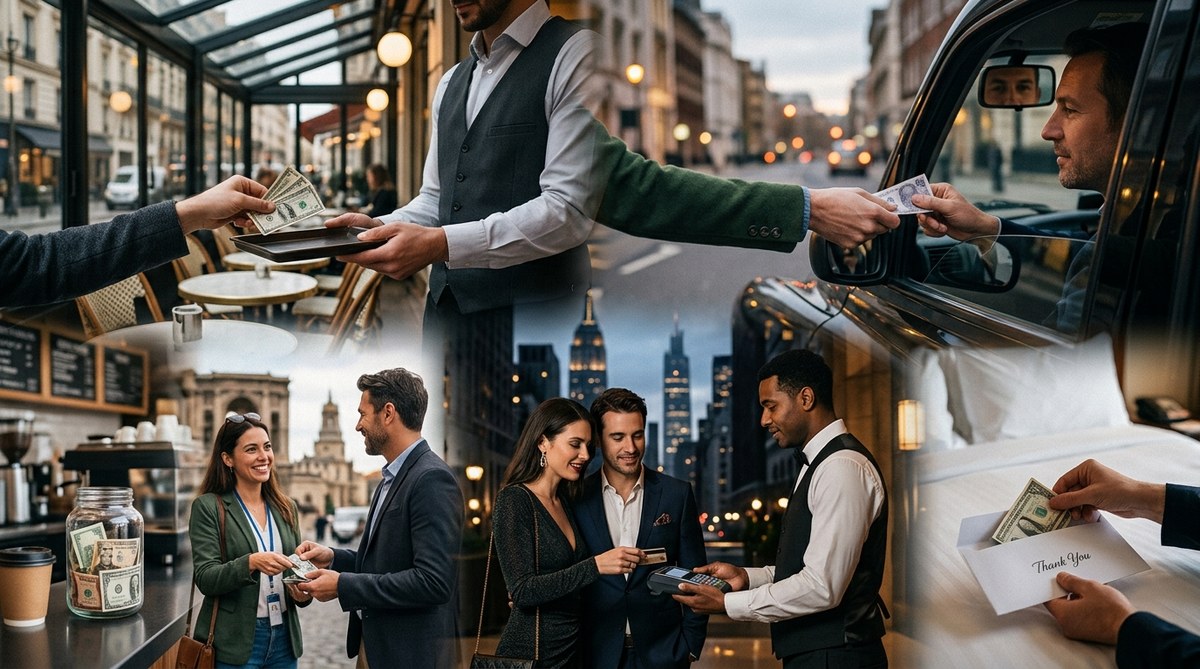
Tipping can feel like a high-stakes guessing game when you land in a new city. One wrong move and you risk looking cheap, clueless, or even offensive. Travelers from non-tipping cultures often struggl…

Tipping can feel like a high-stakes guessing game when you land in a new city. One wrong move and you risk looking cheap, clueless, or even offensive. Travelers from non-tipping cultures often struggle because the rules change not just by country but by neighborhood. The good news is that once you know the unwritten norms, you can move through any city with confidence and respect.

Key Takeaway

Tipping isn’t one-size-fits-all. In US cities, 20% is the baseline for sit-down meals. In Tokyo, handing cash directly to a server is insulting. European cities often include service, but not always. Always carry small bills for hotel staff and drivers. When in doubt, watch what locals do. The unwritten tipping rules major cities follow are about showing gratitude without creating awkwardness. Master these and you will never fumble the bill again.

The 10 Unwritten Tipping Rules Every Traveler Needs to Know

Here is a quick numbered overview of the most common mistakes tourists make with tipping in major destinations. After the list, we will break down each rule in detail.

  1. Treat 20% as the absolute floor in US cities, not the ceiling.
  2. Never leave cash on the table in Japan; use the designated tray.
  3. Always check the bill for a service charge in European restaurants before adding extra.
  4. Skip the tip at restaurants in China unless you are at a fine-dining hotel.
  5. Hand over cash tips for taxi drivers and porters in Latin American cities.
  6. Offer the concierge a folded bill when they secure a tough reservation.
  7. Do not tip taxi drivers in Tokyo or Seoul; they will refuse.
  8. Round up the fare or leave small change in Australia and New Zealand.
  9. Read the resort policy carefully before tipping at all-inclusive properties.
  10. Ask a local or hotel employee when you genuinely cannot figure it out.

Rule 1: In the United States, 20% Is the Baseline, Not a Bonus

New York, Los Angeles, Chicago. Cities across the US operate on a system where servers earn a tipped minimum wage that is far below the standard minimum. That means your tip is not a reward for good service. It is the core of their income. Leaving 15% because the meal was average signals you did not understand the system.

Here is what most tourists get wrong: they sit down at a nice restaurant in Manhattan, see the prices, and think a dollar or two is fine. In reality, the unwritten rule says 20% on the pretax amount for table service. Even for a quick breakfast at a diner, 15% is the minimum. Higher-end places and large groups may require 22% to 25%. If you see an automatic gratuity added, read the fine print. Some restaurants add 18% for parties of six or more, and they expect nothing extra on top.

For more tips on getting around US cities without overspending, check out our guide on how to find budget-friendly hotels in Europe’s most expensive cities (the same budgeting mindset applies to New York).

Rule 2: In Japan, Never Hand Cash Directly to a Server

Tokyo and Osaka are famous for excellent service that is included in the price. Leaving a tip on the table is seen as an insult, as if you are questioning the establishment’s ability to pay its staff. Most Japanese restaurants include a service charge already in your bill.

The unwritten rule here involves using the small tray that sits near the register or handing your payment over with both hands. If you want to show extra gratitude, a small gift or simply a polite bow works wonders. At a ryokan (traditional inn), tipping the housekeeper might be acceptable, but only in an envelope placed discreetly. Never leave coins. Coins are for machines, not for people.

If you are planning a trip to Tokyo, our 48-hour itinerary will help you navigate the city without common cultural missteps.

Rule 3: European Service Charges Can Be Tricky

Paris, Rome, London, and Madrid all have their own quirks. In France, a 15% service charge (service compris) is almost always included in the posted price. Locals do not leave extra change unless the service was outstanding. In Italy, the coperto (cover charge) covers bread and table service, so tipping is not required. But in tourist-heavy spots like Rome, many servers will expect a euro or two for good service.

The mistake tourists make is assuming that because they are in Europe, no tip is needed. That is not true in the UK, where a discretionary service charge of 12.5% is often added for groups of six or more. In Germany, rounding up the bill is standard. The unwritten rule for European cities: always look at the bill for the words “service included” or “service charge.” If you see it, you are done. If not, leaving 5% to 10% is polite but not mandatory.

For a deeper look at eating like a local in Rome, read our first-timer’s guide.

City Common Mistake Correct Action
Paris Leaving 15% on a bill that already includes service Check for “service compris” and leave only small change if happy
Rome Assuming no tip because of coperto Add a euro or two for special service, but not required
London Ignoring the “service charge” line If not added, tip 10-12.5% for sit-down meals
Tokyo Leaving cash on the table Use the tray or envelope; never hand money directly

Rule 4: In China, Tipping Is Almost Never Expected

Beijing, Shanghai, and Hong Kong (though Hong Kong has its own rules influenced by British customs) generally do not have a tipping culture. Handing extra money to a server can cause confusion or even be refused. The exception is in five-star hotels and Western luxury restaurants that cater to international tourists. In those places, a 10% service charge is often added.

The unwritten rule: do not tip at local noodle shops or street stalls. Do not tip taxi drivers. Do tip the bellhop at a high-end hotel in Shanghai one or two dollars. When in doubt, you can politely say “no thanks” if the server tries to give you change and you want them to keep it. That is the closest thing to a tip that feels natural.

Rule 5: Cash Is King in Latin American Cities

Mexico City, Buenos Aires, Lima, and Bogota all fall into a category where credit card tips often do not reach the workers. Many systems deduct a processing fee, or the employer keeps part of the gratuity. The unwritten rule is to tip in cash. Hand the bill to the server with the cash tip folded inside.

For restaurants, 10% to 15% is standard. For tour guides and drivers, a dollar or two at the end of the day is appreciated. In Mexico, leaving coins on the table is common, but paper money carries more weight. Avoid leaving tips on the credit card slip; the server may never see that money.

If you plan to use public transportation in Mexico City, our complete guide will help you move around like a local.

Rule 6: Concierges and Doormen Need a Discreet Handoff

In major US and European cities, the concierge at a luxury hotel can make or break your stay. Getting a last-minute reservation at a hot restaurant or securing sold-out theater tickets deserves a tip. The unwritten rule: offer a folded bill (5 to 20 dollars) when you ask for the favor, not after. That shows you understand the value of their connections.

Doormen who hail a cab or open doors generally expect a dollar or two per interaction in New York. In London, a pound per bag is standard for porters. The mistake tourists make is waiting until checkout to hand over everything at once. Instead, tip small amounts as service happens.

Rule 7: Taxi Drivers in Tokyo and Seoul Will Refuse

In both Japan and South Korea, taxi drivers pride themselves on giving exact change and not expecting tips. If you try to leave extra, they will likely chase you down to return it. That can create an awkward scene.

The unwritten rule is to simply round up the fare to the nearest convenient number if you must, but even that is unnecessary. In Seoul, some modern taxis have a card machine that asks if you want to add a tip. Most locals press “no tip.” If you want to show appreciation, a simple verbal thank you is enough.

Rule 8: Australia and New Zealand Prefer Rounding Up

Sydney, Melbourne, Auckland, and Wellington have a relaxed tipping culture. The minimum wage in both countries is high enough that service workers do not rely on tips. However, for exceptional service or in upscale restaurants, Australians will ask for the bill and say “keep the change” from a note.

The unwritten rule: round up the bill to the nearest 5 or 10 dollars. For example, if your meal costs $47, leave $50. That is considered polite but not mandatory. Never feel pressured to tip 20%. Locals rarely tip more than 10% for outstanding service, and many tip nothing at all.

For a budget-friendly trip down under, see our budget backpacker’s two-week Europe itinerary for inspiration on affordable planning.

Rule 9: All-Inclusive Resorts Have Subtle Rules

Cancun, Punta Cana, and other resort destinations operate on all-inclusive packages. Many tourists assume that everything is covered. While it is true that drinks and meals are included, the staff who serve you round the clock rely heavily on tips. The unwritten rule is to tip daily in cash, not just at the end of your stay.

Hand a dollar or two to the bartender with every round of drinks. Leave a few dollars on the table for your breakfast server. For housekeeping, an envelope with a note is more respectful than leaving cash on the pillow. The mistake tourists make is tipping only on the last day. By then, the staff who served you all week may have rotated shifts and never see your gratitude.

Rule 10: When Confused, Just Ask a Local

The final unwritten rule applies to every major city. If you are standing at a restaurant or hotel lobby and have no idea what the norm is, ask someone who works there. Hotel front desk staff deal with this question daily. They can tell you exactly what is expected.

Alternatively, watch the locals. If you see a local rounding up the bill, do the same. If you see them leaving nothing, follow their lead. The one thing tourists get wrong over and over is assuming that tipping works the same everywhere. It does not. Being observant and humble is the best strategy.

“The most common mistake international visitors make is applying their home country’s tipping logic to a new city. In Paris, you do not tip the way you do in New York. In Tokyo, you do not tip at all. Always assume you are wrong until you confirm.” – Elena Torres, travel etiquette consultant

Putting These Rules into Practice

Before your next trip, take five minutes to check the unwritten tipping rules major cities on our site. Print out a small cheat sheet or save a note on your phone. Have a mix of small bills in the local currency ready before you arrive. That way, you never fumble when the bill arrives or when a porter grabs your suitcase.

Tipping is ultimately about connection. It is a way to say “I see your effort and I appreciate it.” When you get it right, you leave a positive impression that lasts beyond your visit. So use these rules as a starting point, stay curious, and never feel embarrassed to ask. Your travels will be smoother, and the people you meet will feel respected. That is the real win.

For more city-specific travel advice, check out our guides to hidden neighborhoods in Paris and how to spend 5 days in Paris like a local. And if you are heading to Asia, our one week in Southeast Asia itinerary will help you plan without missing a beat.

How to Stay Connected Abroad Without Overpaying for Data

Every international traveler knows that sinking feeling when the landing gear goes up and the “Welcome to [Country]” text from your carrier appears. That text is usually followed by a second message: …

Every international traveler knows that sinking feeling when the landing gear goes up and the “Welcome to [Country]” text from your carrier appears. That text is usually followed by a second message: a cheerful reminder that your data will now cost you a small fortune. Roaming charges have ruined more than a few vacation budgets, and they don’t have to.

The good news? You have more affordable options in 2026 than ever before. Whether you are a frequent flyer or packing for your first trip abroad, you can use your phone without fear of a massive bill. This guide walks you through every practical method to stay connected and keep your money where it belongs: in your pocket.

Key Takeaway

Roaming charges are avoidable with a little planning. The best options for 2026 are eSIMs for convenience and local prepaid SIMs for deep savings. Before you leave, turn off data roaming in your settings, download offline maps, and check if your carrier offers a short-term international pass. Wi-Fi is everywhere, but a backup data plan gives you peace of mind when you really need it.

Why Roaming Charges Still Hurt in 2026

Carriers have not suddenly become generous. Roaming rates remain high because your phone uses a foreign network, and your home carrier pays that network a wholesale fee. That fee gets passed to you, often with a markup. A single photo upload or a quick navigation check can cost several dollars depending on your plan.

Some US carriers now include limited international data in their premium plans. T-Mobile’s Magenta and Go5G plans, for example, offer free 2G data and texts in many countries. AT&T and Verizon have day passes that cap your charges at around $10 per day. Those passes add up fast on a two-week trip. If you travel with family and each person has a phone, the daily fees multiply across every device.

The cheapest approach is to disconnect roaming entirely and use an alternative. Let’s look at the methods that actually work.

The Four Best Ways to Avoid Roaming Charges

Each traveler has different needs. A digital nomad working from a cafe in Lisbon needs far more data than a tourist snapping a few photos in Rome. Here are the four main strategies ranked from most to least convenient.

1. eSIMs: The 2026 Traveler’s Best Friend

An eSIM is a digital SIM card embedded in your phone. You buy a data plan online, install it with a QR code, and activate it when you land. No physical card swapping required.

eSIMs have become the top choice for most travelers because they let you keep your home number active for calls and texts while using a separate data line. You can buy a plan before you leave and activate it the moment your plane touches down. Providers like Airalo, Holafly, and Nomad offer country-specific and regional plans at a fraction of roaming costs. A 7-day, 1GB plan for Japan might cost around $5, compared to $70 or more through a carrier day pass.

Most modern phones support eSIMs, including iPhones from the XR onward, Google Pixels, and Samsung Galaxy S20 and newer models. If your phone is unlocked, you are set. If it is locked to a carrier, you may still be able to use an eSIM as a secondary line, but check with your carrier first.

One small tip: download and install the eSIM profile before you leave. You need internet to activate it, and airport Wi-Fi can be spotty.

2. Local Prepaid SIM Cards

If you want the absolute lowest price and have an unlocked phone, buying a local SIM card is still the winner. A prepaid SIM from a local carrier often includes generous data allowances for a few dollars. In Thailand, for instance, an AIS tourist SIM with 15GB of data for 8 days costs around $8. In Europe, carriers like Vodafone, Orange, and TIM sell prepaid plans that work across multiple countries.

The downside is the hassle. You have to find a store, possibly show your passport, and swap out your home SIM. Keep your home SIM safe in a zippered pocket or a small case. Some travelers carry a cheap second phone just for this purpose.

3. Portable Wi-Fi Hotspots

Portable hotspots are small devices that create a private Wi-Fi network using a local data connection. You rent them before your trip or pick them up at the airport. Services like Pupuru and Solis offer global hotspots with daily data caps.

These devices work well for families or groups because multiple phones can connect to a single hotspot. The main drawbacks are the extra device to carry and charge, and the rental fees that can add up on longer trips.

4. Wi-Fi Only and Offline Maps

You can survive on Wi-Fi alone if you prepare properly. Download offline maps in Google Maps or Apple Maps for every city you plan to visit. Download your boarding passes, hotel confirmations, and any important documents ahead of time. Use messaging apps like WhatsApp or iMessage over Wi-Fi to stay in touch.

This method costs nothing, but it limits your flexibility. You cannot navigate while walking between Wi-Fi zones, and you cannot look up a restaurant recommendation on the fly. It works best for short trips or travelers who stick to cafes and hotels with reliable internet.

How to Set Up Your Phone Before You Leave

Follow these steps to avoid accidental charges the moment you step off the plane.

  1. Turn off data roaming in your settings. On an iPhone, go to Settings > Cellular > Cellular Data Options and toggle off Data Roaming. On Android, go to Settings > Connections > Mobile Networks and turn off Data Roaming.

  2. Disable background app refresh. Apps like email, social media, and weather will keep using data in the background unless you stop them. Turn off background data for every app that does not need real time updates.

  3. Turn on airplane mode when you land. This kills all cellular connections instantly. You can then manually turn Wi-Fi and Bluetooth back on without risking data roaming.

  4. Remove or disable your home SIM if using a local SIM. If you are swapping to a local SIM, physically remove your home SIM or disable it in the dual SIM settings.

  5. Test your eSIM or local SIM with a small data task. Open a web page or send a message to confirm everything works before you rely on it for navigation.

Expert Advice: “I always do a dry run before I leave. I turn on airplane mode, connect to Wi-Fi at home, and make sure my messaging apps work without my cellular line. That way I know my settings are correct before I even get to the airport.” — Sarah Liu, travel tech blogger at Nomad Nexus

Common Mistakes That Still Trigger Roaming Fees

Even with the best intentions, travelers accidentally rack up charges. Here are the most common slip ups and how to avoid them.

Mistake Why It Happens How to Fix It
Visual Voicemail downloads Your phone downloads voicemail over cellular when roaming is on Turn off data roaming before you leave
iMessage activation iMessage may try to activate or verify via SMS when you insert a new SIM Turn off iMessage before removing your home SIM
Automatic email fetch Email apps pull new messages over cellular data Set email to manual fetch or disable cellular data for the Mail app
System services Location services, time zone updates, and weather use data in the background Go to Settings > Privacy > Location Services > System Services and turn off most options
App store updates Apps update over cellular if not restricted Set App Store updates to Wi-Fi only

Choosing the Right Option for Your Trip

The best method depends on your destination, phone model, and travel style. Here is a simple breakdown.

  • You have an eSIM-compatible phone and want zero hassle: Buy an eSIM before you go. It works in over 190 countries and activates with a QR code.

  • You have an unlocked phone and want the cheapest data: Buy a local SIM when you arrive. It takes 15 minutes at the airport but saves you the most money.

  • You travel with family or a group: Rent a portable Wi-Fi hotspot. One device covers everyone and avoids the headache of setting up multiple SIMs.

  • Your trip is short and you stay near Wi-Fi: Use offline maps and free Wi-Fi. No cost, no setup.

If you are planning a longer trip through multiple countries, a regional eSIM or a Europe-wide prepaid SIM is usually the easiest option. Providers like Holafly offer plans that cover all of Europe, Southeast Asia, or Latin America with one installation.

What to Do When You Have No Signal at All

Sometimes you end up in a place with no cellular coverage and no Wi-Fi. Remote hiking trails, subway tunnels, and rural areas can leave you disconnected. Carry a backup plan.

Download offline maps for the entire region, not just the city center. Save your hotel address, embassy contact, and emergency numbers as plain text notes on your phone, not in the cloud. Consider carrying a small paper map as a last resort.

If you are traveling as a couple or group, agree on meeting points and times before you split up. A 15-minute delay in a subway tunnel is fine if everyone knows where to wait.

Internal Links for Deeper City Guides

Learning how to stay connected is just one part of planning a smooth trip. Once you have your data sorted, you can focus on what really matters: experiencing the city. Check out our guide on how to spend 48 hours in Tokyo without breaking the bank for a budget friendly itinerary. If you are heading to Europe, our tips on how to spend 5 days in Paris like a local will help you skip the tourist traps. For first timers in Italy, read the ultimate first-timer’s guide to navigating Rome like a local to make the most of your time.

Your Phone Should Work for You, Not Against You

Roaming charges are an unnecessary stress. With the right preparation, you can land in any country and have working data within minutes for a few dollars. An eSIM takes the guesswork out of the process, but a local SIM works just as well if you prefer tangible control.

Take five minutes before your next trip to turn off data roaming, download an eSIM or research local carriers, and save a few offline maps. That small investment of time will save you money and give you one less thing to worry about. Your vacation should be about the places you see, not the bill that shows up after you get home.

How to Spend 3 Perfect Days in Vienna on a Budget

Vienna has a reputation for being one of Europe’s pricier capitals. And yes, you can drop a lot of money on fancy coffee houses and opera tickets. But here is the truth: Vienna is also one of the most…

Vienna has a reputation for being one of Europe’s pricier capitals. And yes, you can drop a lot of money on fancy coffee houses and opera tickets. But here is the truth: Vienna is also one of the most walkable, park-filled, and publicly accessible cities in Europe. With a little planning, you can see the highlights, eat like a local, and sleep well without emptying your bank account. This guide shows you exactly how to spend 3 days in Vienna on a budget.

Key Takeaway

You can enjoy a full Vienna trip for under $150 per day per person if you use public transit, eat at markets and bakeries, book museum tickets online, and skip overpriced tours. This itinerary focuses on free landmarks, affordable food stalls, budget-friendly museums, and smart transportation choices that save both time and money.

Why Vienna Works for Budget Travelers

Vienna is compact. Most major sights sit inside the Ringstrasse, a circular boulevard that rings the old town. You can walk from one end to the other in about 30 minutes. That means you save on taxis and ride shares. The public transit system is clean, safe, and cheap. A 72-hour ticket costs around 17 euros and covers all trams, buses, and subways.

Many of Vienna’s best experiences are free. You can walk through the grounds of Schonbrunn Palace without paying. You can see St. Stephen’s Cathedral from the inside for free. You can hang out in the Stadtpark, watch the Danube flow by, and visit the Naschmarkt without spending a dime. The city is full of public art, street musicians, and green spaces that reward people who just wander.

Local tip from a Vienna resident: “Most tourists buy the Vienna Pass thinking it saves money. But if you are here for 3 days and move at a relaxed pace, you often spend less by picking two or three paid attractions and leaving the rest for free wandering. The pass only works if you visit five or more paid sites.”

How to Plan Your 3 Days in Vienna on a Budget

Follow these three steps before you go. They will save you both money and frustration.

  1. Book your accommodation in the 7th or 8th district. These neighborhoods are a 15 minute walk from the city center but cost half as much as hotels near St. Stephen’s. You get bakeries, local pubs, and a quieter vibe. Look for guesthouses or apartment rentals on side streets.
  2. Buy a 72-hour public transit ticket at the airport. Use the machine near the baggage claim. It covers trains into town and all city transport. Do not buy single tickets. The pass pays for itself by day two.
  3. Reserve museum tickets online at least 48 hours ahead. The Belvedere and the Hofburg offer lower prices for advance bookings. You also skip the line, which lets you see more in less time.

Day 1: The Imperial City Without the Imperial Price Tag

Morning: Schonbrunn Palace Grounds

Start your trip at Schonbrunn, the summer residence of the Habsburgs. The palace itself costs money to enter. The gardens, the hill, the fountains, and the hedge mazes are all free. Walk up to the Gloriette for a panoramic view of the city. This is one of the best free viewpoints in all of Vienna. Bring a coffee from a nearby supermarket and sit on a bench for a while. Locals do this every weekend.

If you want to see one paid room, choose the Grand Tour. It costs about 20 euros and shows you 40 rooms of imperial life. Book your slot online to save two euros per ticket.

Lunch: Naschmarkt

Take the U4 subway line to Kettenbruckengasse. The Naschmarkt is Vienna’s biggest outdoor food market. You can get a falafel wrap for 4 euros, a bowl of pasta for 6 euros, or a fresh juice for 3 euros. Walk the aisles and sample olives, cheese, and bread from the stalls. This is cheaper than any sit-down restaurant in the first district.

Afternoon: Hofburg Palace and the City Center

Walk from the Naschmarkt to the Hofburg Palace. The walk takes about 20 minutes and passes beautiful buildings along the Maria Theresien Platz. The Hofburg is the former imperial palace. You can enter the courtyards, the library square, and the public gardens for free. The Sisi Museum costs money, but you can skip it and still see plenty.

From the Hofburg, walk to the Rathaus (city hall). The square in front often holds free events. Then head to St. Stephen’s Cathedral. The main nave is free to enter. Climb the south tower for about 5 euros if you want the best view of the rooftops.

Evening: Dinner in the 7th District

The 7th district (Neubau) is full of affordable restaurants and bars. Go to Schleifmuhlgasse or Neustiftgasse. Look for places with chalkboard menus outside. A plate of schnitzel with potato salad costs about 12 euros. A beer is around 4 euros. Skip the restaurants right on the main shopping street. Walk one block sideways for better prices.

Day 2: Art, Parks, and the Famous Coffee Culture

Morning: Belvedere Palace

The Belvedere is a stunning baroque palace complex. The gardens are free and beautiful. The upper palace holds the main art collection. If you want to see Gustav Klimt’s “The Kiss,” you need a ticket. Book online for about 16 euros. The lower palace sometimes has free exhibitions. Check the calendar before you go.

Lunch: A Real Viennese Coffee House

You cannot visit Vienna without sitting in a coffee house. Find one in the 4th or 6th district away from the main tourist streets. Order a Melange (the local cappuccino) and a slice of cake. This costs about 8 to 10 euros total. Sit as long as you want. Bring a book or a journal. This is the Viennese way.

Afternoon: The Prater Park

Take the subway to Praterstern. The Prater is a huge public park with walking paths, meadows, and the famous Riesenrad ferris wheel. You do not need to ride the wheel. It costs 15 euros and the line is long. Instead, walk into the park and enjoy the green space. There are free public toilets, water fountains, and plenty of benches. On weekends, you might see free concerts or sports events in the park.

Evening: Free Music and Local Food

Vienna has a strong tradition of free classical music concerts. Check the website of the Musikverein or the Konzerthaus for free lunchtime or evening shows. Many churches also host free organ concerts. For dinner, try a Wurstelstand (sausage stand). A sausage with bread and mustard costs about 4 euros. It is filling and fast.

Common Mistake Budget Fix
Buying a Vienna Pass for 3 days Pick 2 paid attractions and enjoy free sights instead
Eating on the Graben (main tourist street) Walk 2 blocks away for half the price
Taking taxis from the airport Use the S7 train for 4 euros
Ordering water in restaurants Bring your own reusable bottle
Paying for a guided tour of the city Use a free walking tour app or map

Day 3: Neighborhoods, Hidden Views, and Leaving Room to Wander

Morning: The 8th District and the Volksgarten

Start your last day in the 8th district (Josefstadt). This is a quiet residential area with lovely courtyards and small cafes. Walk to the Volksgarten, a beautiful public garden with roses and a view of the Hofburg. It is free and usually not crowded. From there, walk toward the Parliament building and the Rathaus for photos.

Lunch: The Brunnenmarkt

Head to the 16th district for the Brunnenmarkt. This is a working-class market with Middle Eastern, Turkish, and Balkan food. You can get a huge plate of grilled meat with rice and salad for 6 euros. The area feels completely different from the center. It is authentic and full of energy.

Afternoon: Karlskirche and the Musikverein

Walk to Karlskirche (St. Charles Church). The church charges a small entry fee (about 8 euros) but the interior is stunning. If you want a free option, just sit on the grass by the pond in front of the church. The reflection is one of the most photographed scenes in Vienna.

If you have not seen a free concert yet, check the Musikverein box office for last minute standing tickets. These cost around 10 euros and let you hear world-class music for a fraction of the normal price.

Evening: A Final Walk Along the Danube Canal

End your trip with a walk along the Danube Canal. The canal has murals, street art, and casual bars under the bridges. You can find food trucks and pop up stands selling cheap drinks and snacks. The atmosphere is relaxed and young. This is where locals hang out on warm evenings.

Where to Save Money in Vienna

Here are the six biggest money savers for your trip.

  • Use the 72-hour transit pass. It covers everything and costs less than two taxi rides.
  • Eat lunch at markets. The Naschmarkt and Brunnenmarkt offer filling meals for under 7 euros.
  • Skip the hotel breakfast. Buy a pastry and coffee at a bakery for 4 euros instead.
  • Visit free museums on the first Sunday of the month. Many museums offer free entry that day.
  • Drink tap water. Vienna has some of the best tap water in Europe. Carry a bottle.
  • Walk everywhere in the center. You will see more and spend nothing.

A Note on Attraction Passes

Many first time visitors wonder about the Vienna Pass. It costs around 85 euros for 72 hours. You need to visit at least five paid attractions for it to pay off. If you move at a relaxed pace and enjoy walking around, you are better off picking two paid sites and skipping the rest. Check out this guide on whether city attraction passes are actually worth the money for a deeper breakdown.

For finding the best places to stay on a budget, read up on how to find budget-friendly hotels in Europe’s most expensive cities. The strategies there work especially well for Vienna.

Your Real Daily Budget for 3 Days in Vienna

Here is what you will actually spend if you follow this itinerary.

Category Estimated Cost per Day
Accommodation (shared or budget room) $50 to $70
Food (market breakfast, market lunch, pub dinner) $25 to $35
Transit (72 hour pass divided by 3) $6
Attractions (2 paid sites over 3 days) $10 to $15
Coffee and treats $5 to $8
Total per day $96 to $134

This leaves room for a souvenir or an extra beer. Vienna on a budget is not about deprivation. It is about making smart choices.

Making the Most of Your Time Without Spending More

The best thing about Vienna is that the city itself is the attraction. The architecture, the parks, the street art, the people watching. You do not need a ticket to enjoy the Ringstrasse. You do not need a guide to appreciate the Danube. You do not need a pass to sit in a coffee house and watch the world go by.

If you are someone who likes to find hidden spots, take a look at 15 hidden gems locals don’t want tourists to know about. Many of those ideas apply to Vienna too.

How to Eat Well Without Spending Much

Vienna’s food scene is surprisingly budget friendly if you know where to look. The city has hundreds of bakeries (backerei) where you can get fresh bread, pastries, and coffee for under 5 euros. The supermarkets like Spar and Billa sell prepared sandwiches, salads, and drinks for half the price of cafes.

For a full guide on saving money on food while traveling, check out budget eating in expensive cities: 15 strategies that actually work. Many of the tips apply directly to Vienna.

The One Splurge Worth Making

If you have room in your budget for one special experience, make it the Staatsoper (Vienna State Opera). Standing tickets cost as little as 10 euros. You get to see one of the world’s greatest opera houses for the price of a sandwich. Buy them at the box office about an hour before the show. Dress is casual. Do not worry about formal clothes. Just go and enjoy the music.

A Final Thought on Your 3 Days in Vienna

Vienna is a city that rewards people who take their time. You do not need to rush. You do not need to see everything. The magic of this place comes from the small moments: sitting in a park with a pastry, hearing music float out of a open window, watching the trams roll by on a quiet street. Those moments are free.

If you are planning more European trips on a budget, you might enjoy this guide on how to spend a perfect 3 days in Lisbon in 2026 or this budget backpacker’s two-week Europe itinerary covering 6 cities under $1500.

Go to Vienna. Walk the streets. Eat the sausage. Drink the coffee. And come home with money still in your pocket. That is the best souvenir of all.

A 3-Day Chicago Itinerary for Food Lovers and Architecture Enthusiasts

Chicago hits you right away. One minute you are stepping out of a cab on Michigan Avenue, and the next you are staring up at a canyon of steel and glass that seems to touch the clouds. The air smells …

Chicago hits you right away. One minute you are stepping out of a cab on Michigan Avenue, and the next you are staring up at a canyon of steel and glass that seems to touch the clouds. The air smells like lake water, hot dog stands, and something baking in a deep dish pan. This city does not ease you in. It greets you with a handshake and a slice of pizza. For travelers who love architecture and food, Chicago is a playground. The skyline tells a story of innovation, while every neighborhood has a signature dish or a family run spot that has been serving it for decades. A 3 day Chicago itinerary can feel tight, but with a little planning, you can taste the city and admire its design without rushing. Let me show you how.

Key Takeaway

This 3 day Chicago itinerary balances world class architecture with unforgettable food stops. You will ride a river cruise through the heart of the city, climb to the top of a famous skyscraper, eat deep dish pizza where it was invented, and explore neighborhoods that locals love. The plan works for first time visitors and return travelers alike. Each day mixes sightseeing with meals that matter, so you leave full in every sense.

Day One: The Skyline And A Slice Of History

Your first day in Chicago should start with a view. Head straight to the Chicago Riverwalk and find a spot near the intersection of Michigan Avenue. The sun hits the Wrigley Building and the Tribune Tower in a way that makes you reach for your phone. But do not linger too long. You have a boat to catch.

Morning Architecture River Cruise

The Chicago Architecture Foundation Center runs a 90 minute river cruise that covers more than 50 buildings along the Chicago River. This tour is the single best introduction to the city. You will glide past the Wills Tower, the Marina City towers (those corn cob shaped buildings), and the sleek Aqua building. The guides are volunteers who actually know the stories behind each structure. They will tell you about the Great Chicago Fire of 1871, the birth of the skyscraper, and why the city reinvented itself so many times.

Book the earliest tour of the day. Crowds are smaller, and the light is better for photos.

Lunch at a Classic Italian Beef Spot

After the cruise, walk north into River North for lunch. Al’s Beef on West Adams Street serves the original Italian beef sandwich. Order it “dipped” with hot giardiniera. The meat is thin, juicy, and piled high on a roll that somehow holds it all together. This is not a tourist trap. This is a working class lunch that Chicagoans have been eating since the 1930s.

If you want something lighter, grab a Chicago style hot dog from a cart near Millennium Park. Remember the rules: no ketchup. Mustard, relish, onions, tomatoes, sport peppers, and a pickle spear. That is the Chicago way.

Afternoon at Millennium Park and The Art Institute

Millennium Park is home to Cloud Gate, which everyone calls The Bean. It is shiny, reflective, and way more fun to walk under than you expect. Spend 15 minutes here, take your photos, and then walk south to the Art Institute of Chicago. This museum has one of the best Impressionist collections in the world. You can see Monet’s Haystacks, Seurat’s A Sunday on La Grande Jatte, and Grant Wood’s American Gothic. Plan for two hours minimum.

Dinner: Deep Dish Done Right

You cannot visit Chicago without deep dish pizza. But skip the chains. Go to Lou Malnati’s on North Wells Street. The crust is buttery, the cheese is layered under the sauce (a signature move), and the sausage patty covers the entire pie. Order a small if you are alone or a medium for two. One slice will fill you up. Two slices mean no dessert.

“Deep dish is not pizza. It is a casserole that happens to have a crust. And it is glorious.” – A local server at Lou Malnati’s


Day Two: Neighborhoods, Skyscrapers, And A Second Slice

Day two goes deeper. You will leave the Loop and explore neighborhoods that define Chicago’s food and culture.

Morning in Wicker Park and Bucktown

Start your day with breakfast at The Bongo Room on Milwaukee Avenue. Their chocolate banana caramel French toast is famous for good reason. But the real move is the breakfast burrito with tomatillo salsa. After eating, walk north on Milwaukee Avenue and window shop the vintage stores and indie bookshops. This neighborhood feels like a small town inside a big city.

Midday: The 360 Chicago Observation Deck

Take the Blue Line back downtown and head to the 360 Chicago Observation Deck on the 94th floor of the John Hancock Center. The view is straight down the Magnificent Mile and across the lake. On a clear day, you can see four states. The TILT experience lets you lean out over the street at a 30 degree angle. It is not for the faint of heart, but it makes a great video.

Lunch in Chinatown

Chicago’s Chinatown is one of the oldest in the country. Take the Red Line to Cermak Road. Walk under the ornate gate and head to MingHin Cuisine for dim sum. The har gow (shrimp dumplings) and siu mai are as good as anything in San Francisco or New York. If you want something more casual, grab a bubble tea and a pork bun from Chiu Quon Bakery.

Afternoon Architecture Walk: The Loop

Spend the afternoon walking the Loop. Here are five buildings you should not miss:

  • The Rookery Building (209 S LaSalle Street) – Frank Lloyd Wright’s lobby renovation is stunning
  • The Marquette Building (140 S Dearborn Street) – A masterpiece of the Chicago School
  • The Chicago Board of Trade Building (141 W Jackson Boulevard) – Art Deco at its finest
  • The Monadnock Building (53 W Jackson Boulevard) – The tallest brick building in the world
  • The Harold Washington Library (400 S State Street) – A modern landmark with a giant owl on top

Dinner: A Taste Of The West Loop

The West Loop has become Chicago’s best food neighborhood. Go to Au Cheval for a burger that people argue about online. The single cheeseburger with bacon and an egg is worth the wait. No reservations. Expect a line. But the line moves, and the bar next door serves great cocktails while you wait.


Day Three: Neighborhood Gems And A Sweet Farewell

Your last day should be slower. You have seen the skyline and eaten the classics. Now it is time to find the hidden corners.

Morning in Hyde Park

Take the Metra Electric Line south to Hyde Park. This is where the University of Chicago sits, and the campus feels like Oxford dropped into the Midwest. Walk through the Main Quadrangle and then head to the Museum of Science and Industry. It is huge. Pick one exhibit (the U-505 submarine is incredible) and spend an hour there.

The real reason to come here is the food. Get a breaded steak sandwich from The Original Shrimp. It is a South Side specialty. Thin pounded beef, breaded and fried, served on a roll with hot sauce and pickles. It is messy. It is perfect.

Midday: Lincoln Park and The Zoo

Take the train back north and spend an hour at the Lincoln Park Zoo. It is free and beautifully maintained. The lions and polar bears are always popular. After the zoo, walk through the Lincoln Park Conservatory. The fern room smells like a rainforest.

Late Lunch at a Polish Kitchen

Chicago has one of the largest Polish populations in the world. Head to Podhalanka in the West Town neighborhood. This tiny counter serves pierogi (stuffed dumplings), kielbasa, and potato pancakes. The atmosphere is no frills. The food tastes like someone’s grandmother made it. That is because someone’s grandmother did.

Afternoon: The Last View

End your trip where it started: on the water. Rent a kayak on the Chicago Riverwalk and paddle through the heart of the city. You will see the buildings from below, and the reflections on the water create a second skyline. It is a peaceful way to say goodbye.

Final Dinner: A Modern Classic

For your last meal, book a table at Monteverde in the West Loop. Chef Sarah Grueneberg makes handmade pasta that changes with the seasons. The cacio e pepe is simple, rich, and unforgettable. Order a glass of wine and toast your trip.


How To Plan Your 3 Day Chicago Itinerary: A Step by Step Guide

Here is a simple process to lock in your plans before you arrive:

  1. Book your architecture river cruise at least two weeks in advance. Weekend slots sell out fast.
  2. Reserve dinner spots for Au Cheval and Monteverde as early as possible. Monteverde accepts reservations 30 days ahead.
  3. Purchase a Ventra card for the CTA trains and buses. You can load it at any station kiosk.
  4. Download the Chicago Architecture Center app for self guided walking tours.
  5. Pack layers. Chicago weather changes hour to hour. A jacket in the morning might feel heavy by lunch.

What To Eat And Where: A Handy Reference

Dish Best Place Neighborhood Why It Matters
Deep dish pizza Lou Malnati’s River North Buttery crust, perfect sauce to cheese ratio
Italian beef Al’s Beef Greektown Dipped and loaded with giardiniera
Chicago hot dog Portillo’s Multiple locations All the fixings, no ketchup
Breaded steak sandwich The Original Shrimp Hyde Park A South Side classic
Pierogi Podhalanka West Town Homestyle Polish cooking
Handmade pasta Monteverde West Loop Seasonal and sensational

Three Mistakes To Avoid On A Chicago Trip

  • Skipping the architecture cruise. You will see more from the water than from the sidewalk. Do not miss it.
  • Eating only deep dish. Chicago has world class pizza, but it also has Italian beef, Polish food, Mexican taquerias, and Asian bakeries. Try them all.
  • Staying only in the Loop. The neighborhoods are where the soul of the city lives. Wicker Park, Hyde Park, and Lincoln Park each offer something different.

Why This Itinerary Works For Food Lovers And Architecture Fans

Chicago is not a city you can see in a weekend. But you can taste it. You can stand under a Frank Lloyd Wright ceiling and then walk two blocks to a restaurant that has been serving the same recipe for 80 years. That combination of old and new, of heavy steel and delicate pasta, is what makes this city special. This 3 day Chicago itinerary gives you both sides. You will leave with photos of the skyline and a list of places you want to visit next time.

Pack comfortable shoes. Bring an open appetite. And when someone asks you about your trip, tell them about the moment you saw the sun set over the river while holding a slice of pizza. That is the Chicago moment you will remember.

For more travel inspiration, check out our guide to the ultimate first-timer’s guide to navigating Rome like a local or our tips on how to avoid tourist traps and overpriced restaurants in any city. And if you are planning more long weekends, our 48 hours in Amsterdam: the ultimate two-day city break is a great follow up read.